From Principle to Practice: Aligning Maximo and GIS in Minutes, Not Months

Talking about shared truth is one thing. Implementing it is where most organizations get stuck.
Traditional Maximo–GIS integrations require custom development, long lead times, and specialist technical staff. PowerSync was designed to remove that friction entirely, allowing configuration of bidirectional integration without writing code.
The following steps illustrate how quickly a typical integration can be configured.
The first step is simply defining the GIS service to integrate with.
This involves providing:
Once configured, PowerSync can securely communicate with the GIS service.

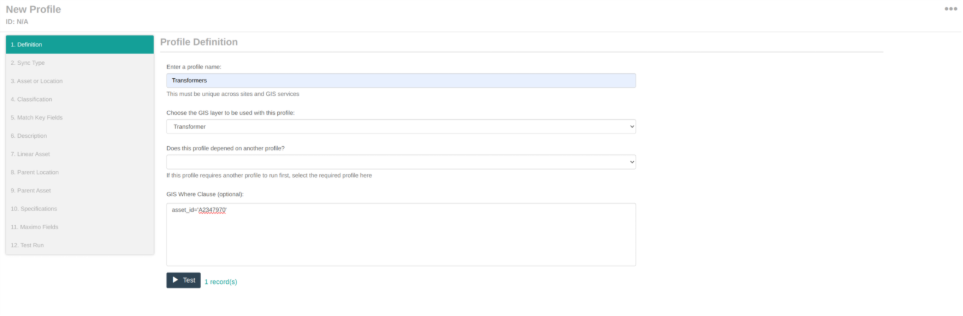
Rather than treating integration as a single, monolithic process, PowerSync works through profile definitions. Each profile represents a GIS feature class and how it should interact with Maximo.
This approach gives fine-grained control and reflects how asset data actually varies across classes.
Each profile is given:
This allows organizations to scope integration precisely, rather than synchronizing entire layers unnecessarily. In the screenshot above, the full configuration workflow is visible in the panel on the left. For the remaining screenshots, this list has been intentionally redacted to keep the focus on each step as it is completed.
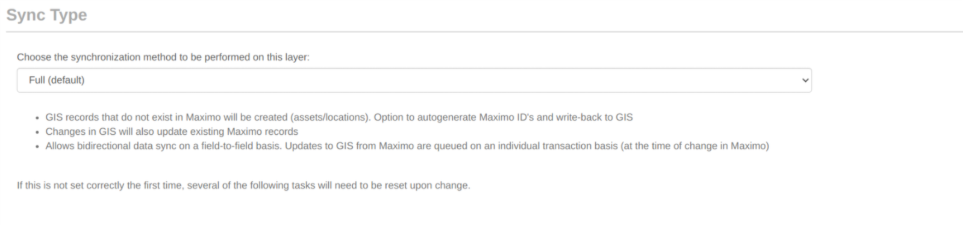
For each profile, the synchronization behavior is defined. Options include:
This flexibility is critical; not every asset class needs the same behavior.
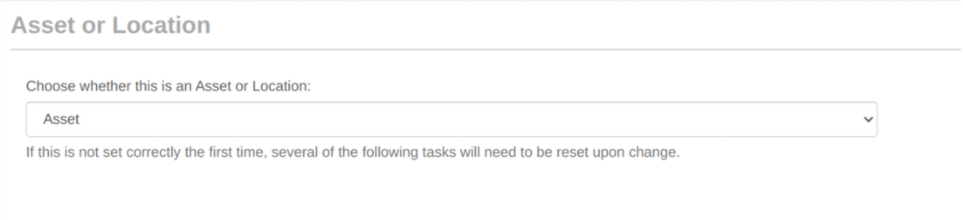
PowerSync supports both assets and locations. This distinction ensures that data flows into the correct Maximo objects and behaves as expected downstream.
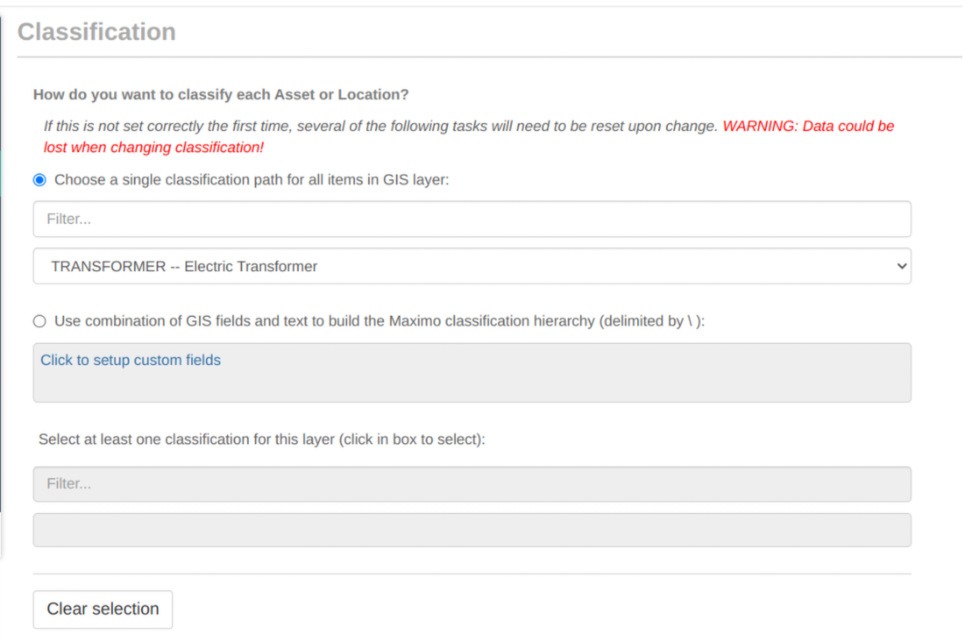
The relevant Maximo asset classification is selected directly.
Where needed, classification hierarchies can also be constructed dynamically in Maximo based on GIS attributes, using custom delimiters. This removes the need for manual pre-configuration and keeps classifications aligned with spatial data.
At this stage, the identifiers used by Maximo and GIS are mapped to each other. This ensures records remain linked correctly across systems and enables reliable bidirectional updates.

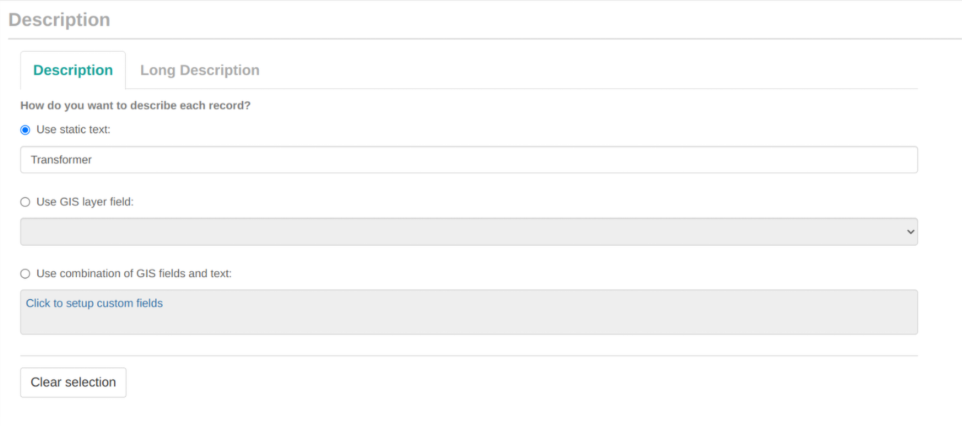
Record descriptions in Maximo can be generated using:
This allows descriptions to be meaningful and consistent without manual intervention.
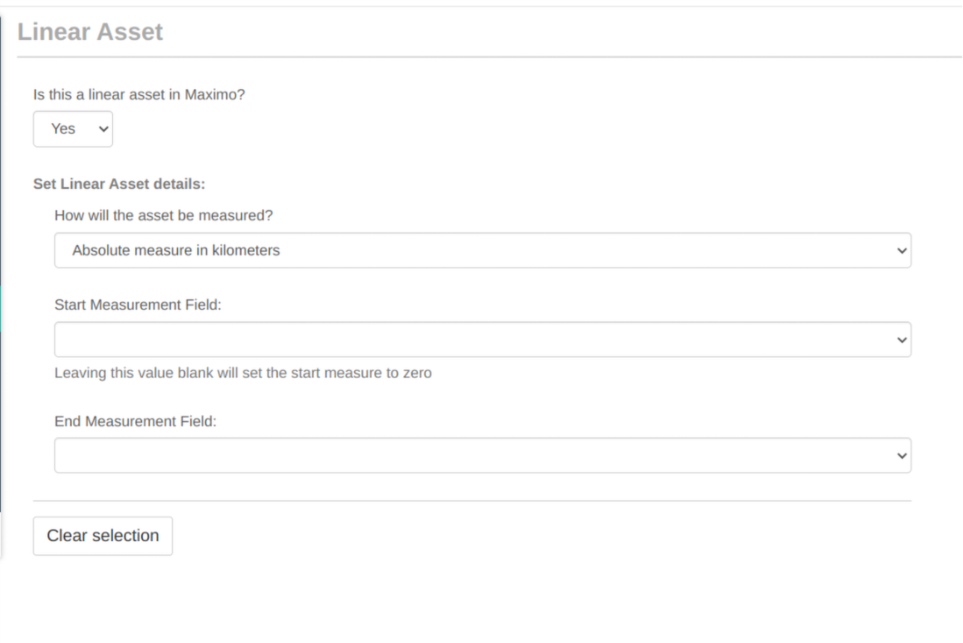
For linear assets, the relevant start and end measure fields are specified. This ensures linear referencing is handled correctly and remains consistent between systems.
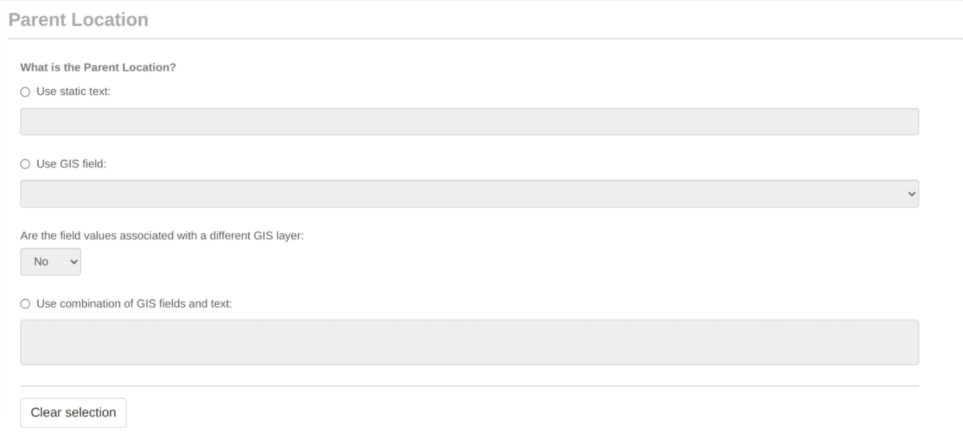
Parent locations can be defined using:
This flexibility allows location hierarchies to be constructed accurately from spatial data.
Parent assets are configured in exactly the same way, supporting complex asset hierarchies without custom logic.
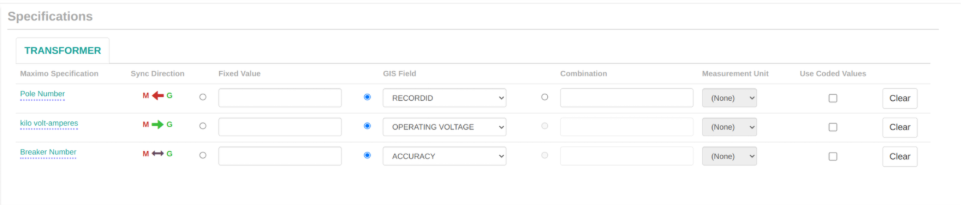
For each Maximo specification:
This is where shared truth becomes explicit and governed at the field level.
Field mapping follows the same pattern as specifications, but applies directly to Maximo fields. This consistency makes the configuration intuitive and transparent.
Finally, a test run is executed.
Within minutes, a fully operational bidirectional integration is live, observable in real time, configurable without code, and easy to adapt as requirements evolve.

What this process demonstrates is not just ease of setup, but a shift in how integration is approached.
Instead, organizations gain a flexible, observable, and governed way to ensure Maximo and GIS truly share the same truth.
With that foundation in place, the next challenge becomes clear: how to make that aligned data visible and usable in day-to-day operations.
Next in the series --> Operational Context Lives on the Map: exploring how shared asset and spatial data can be brought together into a single operational view.
Discover everything you need to know to modernize your asset management strategy.
Inside, you’ll learn:

ActiveG, BPD Zenith, EAM Swiss, InterPro Solutions, Lexco, Peacock Engineering, Projetech, Sharptree, and ZNAPZ have united under one brand: Naviam.
You’ll be redirected to the most relevant page at Naviam.io in a few seconds — or you can
go now.


.avif)