
Use Case: A Multi-Select Dialog That Triggers an Automation Script
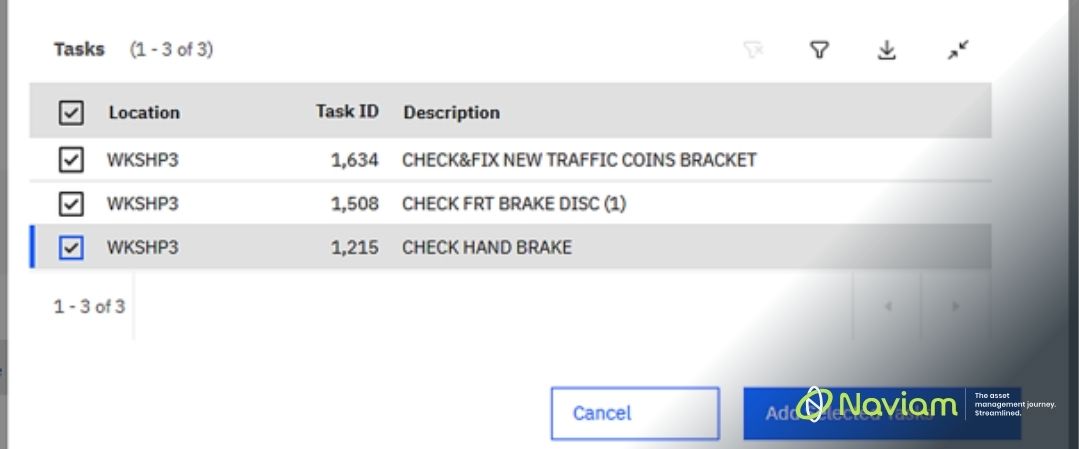
Here is a scenario that comes up in Maximo implementations: a planner opens a work order for a vehicle and needs to add half a dozen repair tasks to it. Those tasks are not invented on the spot. They already exist as records, held against a repair location, and the same handful gets used again and again.
The instinct is usually a job plan. That works when the same bundle of tasks applies every time, but it falls apart the moment the planner needs an arbitrary subset. Ten job plans become forty, then a hundred, each a slight variation on the last. The alternative, typing the tasks in by hand, is slower and produces a different description every time someone spells a word differently.
In this blog we walk through a third option: a custom dialog that lists the tasks already on file, lets the planner tick the ones they want, and copies them onto the work order in a single click. One signature option, one dialog, and a short automation script. No new objects, no Java.
The context is a Work Order Tracking screen with a Tasks table. Three pieces are already in place:
The Core Idea: the dialog does not save anything itself. It is a picker. All it does is hold a set of records and remember which ones the user ticked. A signature option fired from the OK button hands control to an automation script, and the script does the actual work.
The signature option is the bridge between a button on the screen and a script on the server. Without it there is no way for a pushbutton to reach an Action launch point.
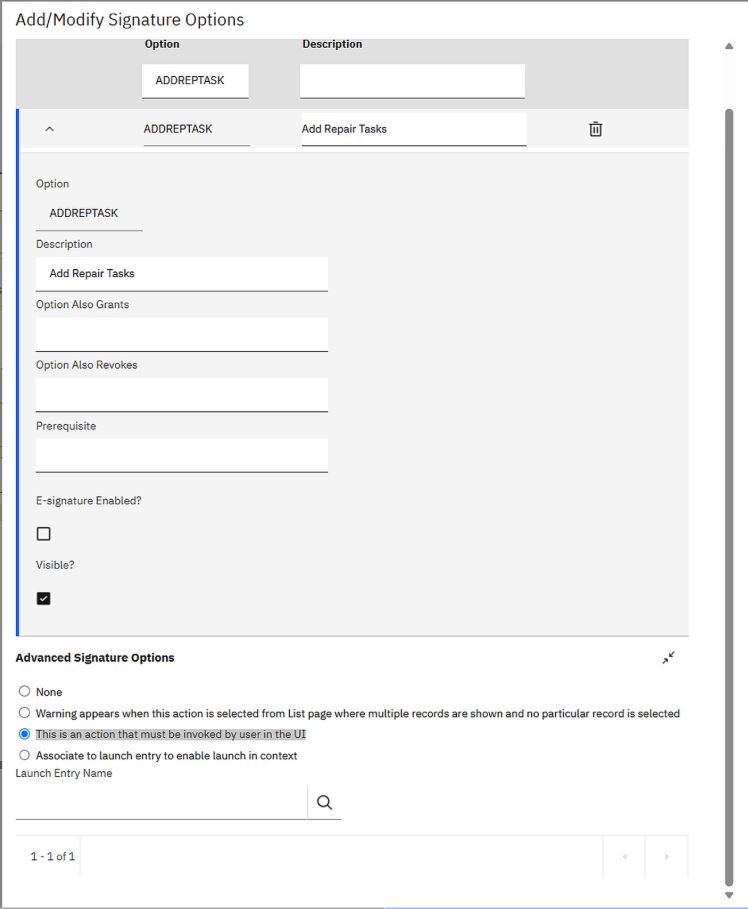
The option name, ADDREPTASK, is the exact string the dialog button will fire, and it is case sensitive.
Remember to grant ADDREPTASK to the security groups that need it. If the option exists but is not granted, the button renders, the dialog opens, and pressing OK does nothing at all with no error shown.
In Application Designer, a pushbutton is added to the Tasks table toolbar.
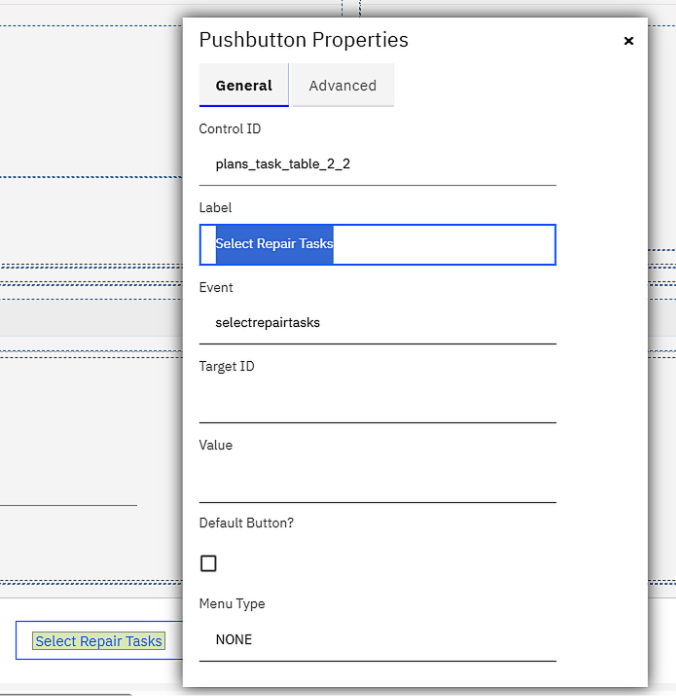
The trick here: setting the Event to a dialog id is all it takes to open that dialog. There is no script involved in this half of the solution, and no Target ID or Value is needed. Maximo sees an event name that matches a dialog in the presentation and opens it against the current record.
The dialog is added to the application XML. It is short, and every attribute earns its place.
<dialog beanclass="psdi.webclient.system.beans.MultiselectDataBean"
        id="selectrepairtasks" label="Select Repair Tasks"
        parentdatasrc="MAINRECORD" relationship="TASKREPLOC"
        savemode="onunload">

  <table id="selectrepairtasks_select_table" inputmode="readonly"
         label="Tasks" selectmode="multiple" width="700">
    <tablebody displayrowsperpage="15" filterable="true"
               id="selectrepairtasks_select_table_tablebody">
      <tablecol id="selectrepairtasks_select_table_tablebody_1"
                mxevent="toggleselectrow" type="event"
                filterable="false" sortable="false"/>
      <tablecol dataattribute="location"    id="..._tablebody_2"/>
      <tablecol dataattribute="taskid"      id="..._tablebody_4"/>
      <tablecol dataattribute="description" id="..._tablebody_3"/>
    </tablebody>
  </table>

  <section id="selectrepairtasks_btn_section">
    <sectionrow id="selectrepairtasks_btn_row">
      <section datasrc="mainrecord" id="selectrepairtasks_act_section">
        <buttongroup id="selectrepairtasks_act_bg">
          <pushbutton id="selectrepairtasks_cancel" label="Cancel"
                      mxevent="dialogcancel"/>
          <pushbutton id="selectrepairtasks_add" label="Add Selected Tasks"
                      mxevent="ADDREPTASK" default="true"/>
        </buttongroup>
      </section>
    </sectionrow>
  </section>
</dialog>
Reading it from the top:
The two buttons at the bottom are where the design decision lives. Cancel uses the delivered dialogcancel event. The Add Selected Tasks button uses mxevent="ADDREPTASK", the signature option from Step 1.
A common wrong turn: copying a delivered multi-select dialog and leaving its OK button as mxevent="dialogok" with a value attribute. That value names a Java method on the application bean, so it will happily call something written for a completely different table. An automation script can never be named there. Fire the signature option instead.
The script is an Action launch point on WORKORDER, bound to the ADDREPTASK signature option.
# Script  : ADDREPTASK
# Trigger : Action launch point — WORKORDER, signature option ADDREPTASK
# Purpose : Copy the repair tasks ticked in the dialog onto the work order.

from psdi.mbo import MboConstants

# mbo here is MAINRECORD, the work order, because the button sits in a
# section with datasrc="mainrecord"
target_set = mbo.getMboSet("SHOWTASKS")

# read the ticked rows straight out of the dialog's data bean
session   = service.webclientsession()
databean  = session.getDataBean("selectrepairtasks")   # the dialog id
mboSet    = databean.getMboSet()
selection = mboSet.getSelection()

for task in selection:
    location    = task.getString("LOCATION")
    description = task.getString("DESCRIPTION")

    new_task = target_set.add()
    new_task.setValue("repairfacility",   location,    MboConstants.NOACCESSCHECK | MboConstants.NOVALIDATION_AND_NOACTION)
    new_task.setValue("description",      description, MboConstants.NOACCESSCHECK | MboConstants.NOVALIDATION_AND_NOACTION)
    new_task.setValue("assetnum",         None,        MboConstants.NOACCESSCHECK | MboConstants.NOVALIDATION_AND_NOACTION)
    new_task.setValue("parentchgsstatus", False,       MboConstants.NOACCESSCHECK | MboConstants.NOVALIDATION_AND_NOACTION)
    new_task.setValue("woacceptscharges", False,       MboConstants.NOACCESSCHECK | MboConstants.NOVALIDATION_AND_NOACTION)

service.closeDialog()
The part worth studying: the three lines that fetch the selection. The script asks the web client session for the data bean behind the dialog, by dialog id, then asks that bean for its MboSet and calls getSelection(). That returns only the rows the user ticked. Go through the data bean and the selection is simply there.
The rest is ordinary Maximo.
The work order starts with an empty task list and a single button.
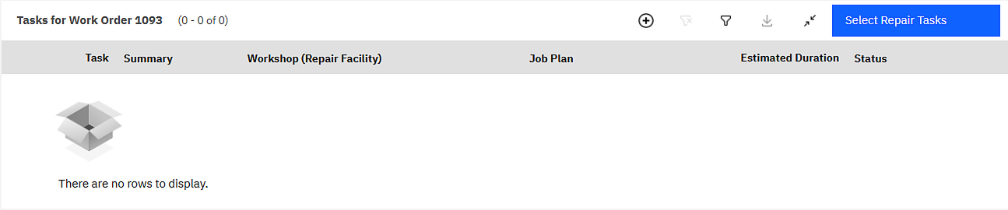
Clicking it opens the dialog against the tasks available for that work order.
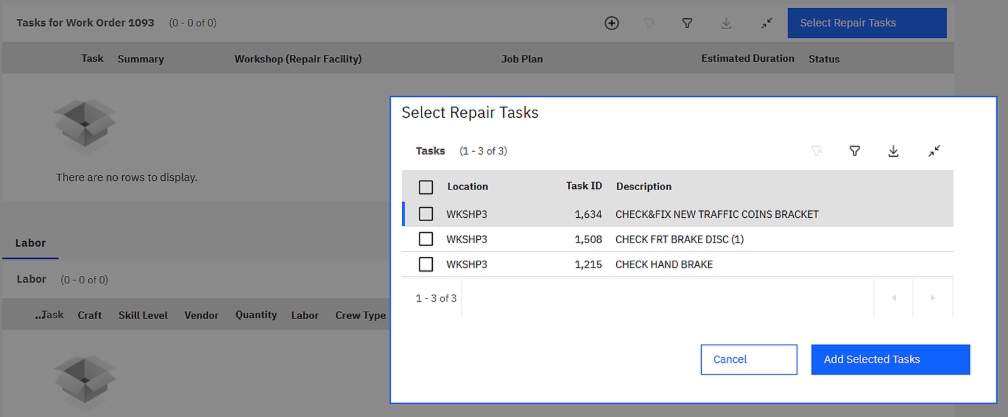
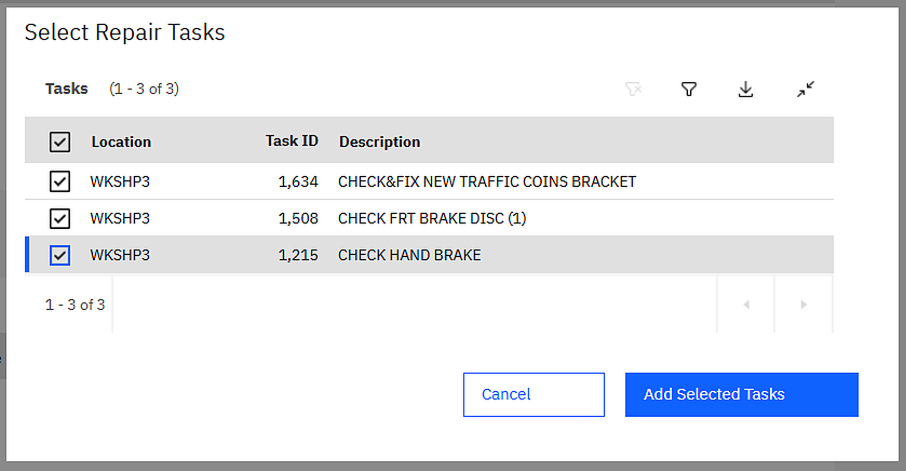
The planner ticks what they need. The header checkbox selects all three at once.
One click on Add Selected Tasks, and the dialog closes onto a populated task list.
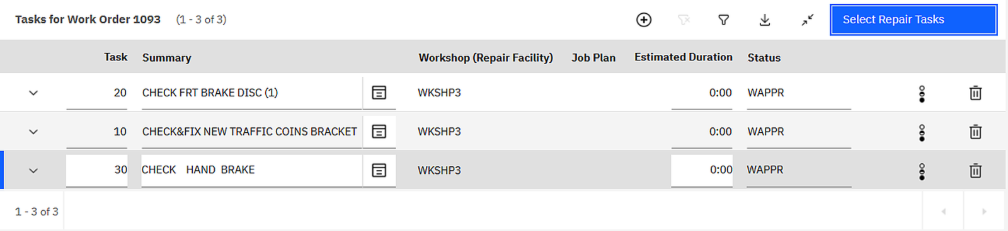
The whole interaction is four clicks.
Nothing in this solution is specific to repair tasks. To point it at a different source or target, four things change and nothing else:
The signature option, the button wiring and the getSelection logic never change.
One thing to get right up front: scope the source relationship properly. A picker that returns every row in a catalogue is unusable on real data. Filter it by related attributes in the relationship where clause, not in the script, so the dialog only ever fetches what it needs to show.
Custom dialogs have a reputation for being tricky, and the tricky part is almost always the same: getting a button on a screen to reach code on the server that is usually handled by a Java code. Once you know that a pushbutton event can name a dialog to open it, and a signature option to run a script, the rest is a short piece of Automation Script.

Discover everything you need to know to modernize your asset management strategy.
Inside, you’ll learn:


ActiveG, BPD Zenith, EAM Swiss, InterPro Solutions, Lexco, Peacock Engineering, Projetech, Sharptree, and ZNAPZ have united under one brand: Naviam.
You’ll be redirected to the most relevant page at Naviam.io in a few seconds — or you can
go now.


.avif)